App configurations
ProconTEL 4 allows users for managing App configurations easily. The goal of this article is to clarify how it works.
Basic configuration
Basic configuration is being defined in appsettings.json file while creating App Template.
Overwriting configuration when adding template
Basic configuration can be overwritten and expanded while App Template is being added.
To overwrite configurations which come straight from the template, we specify items with the same key as ones from appsettings.json.
Given that in appsettings.json we had configuration item with key backupInterval set to value 10, we can easily override it by creating configuration item with the same key but different value.
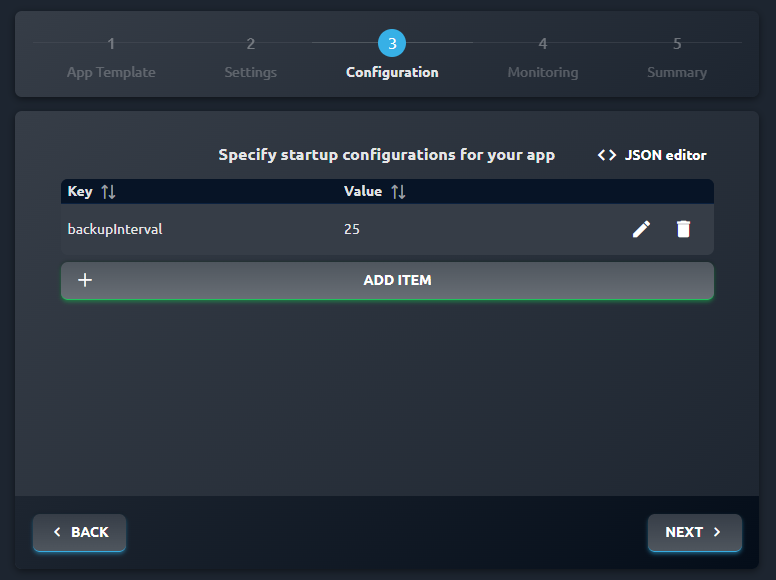
Given that our basic configuration was a nested object, e. g.
 "MyBasicConfiguration": {
    "MyFirstItem": {
        "ActualConfig": false
    }
 }
Nested configurations (.NET)
We could override that configuration like this:
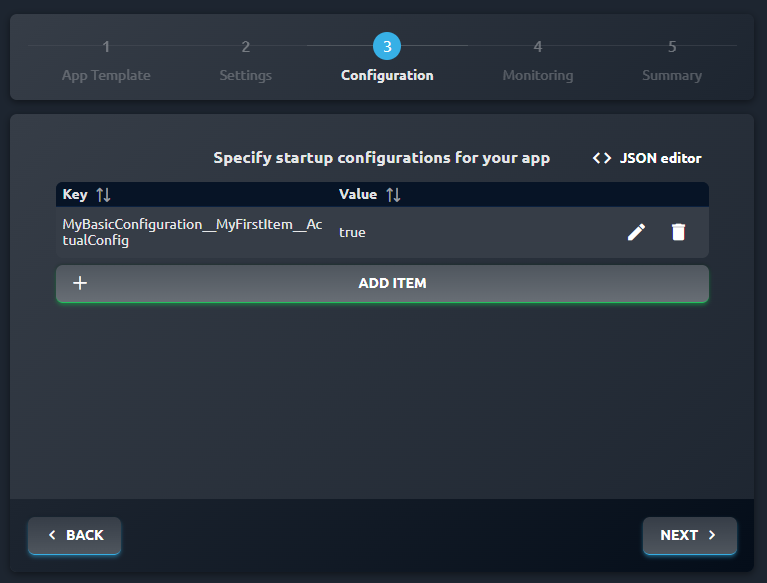
As you can see, each level of nesting is accessed here by __ (double underscore).
If you'd like to have an array of items you need to specify each of them by appending key with __ and index number. For example if you want to have some value
as first item of your array it would look like arrayKey__0 and then your value.
After creating App Template you can edit its configurations in edit view.
Providing configuration by JSON editor
From 4.0.4 release JSON editor has been added to ProconTEL.
For now there is support only for .NET app templates!
To use it, all you need to do is to click on the button, shown on the image below.
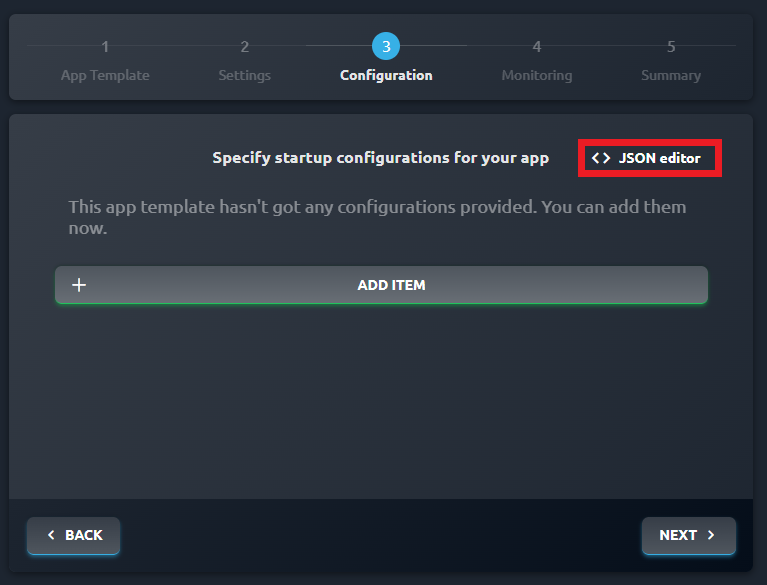
After clicking the button, the editor will appear.
From now on, you can work with your configurations like with JSON objects in your IDE. Using editor helps sharing configs by allowing user to copy entire object and greatly improves readability. What's more editor uses Monaco editor (the one that powers Visual Studio Code) so any Visual Studio Code keyboard shortcuts you know are also valid.
After filling editor with your config as JSON, it gets mapped and uses convention which we were describing earlier here.
If you've had any configs before filled with standard way - they will be converted to JSON automatically if you switch to JSON editor as shown below.
Let's first fill our configuration using JSON editor:
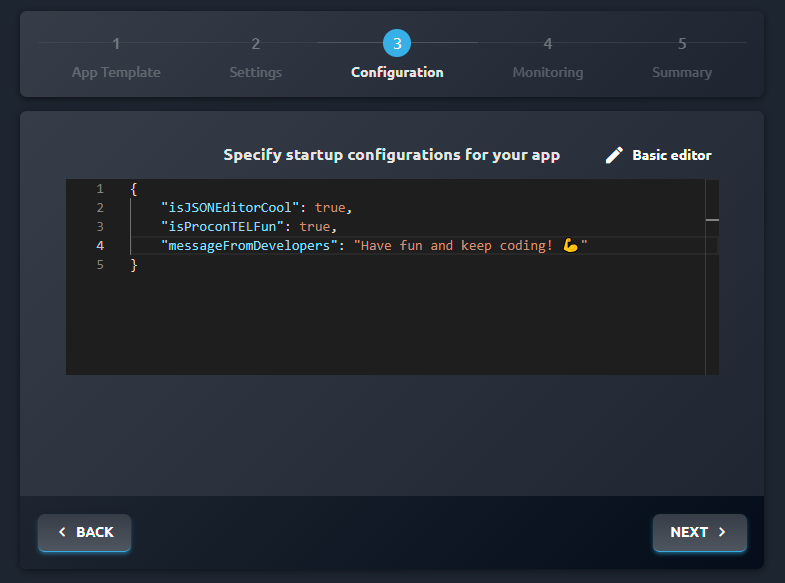
And go to our Basic editor to see that everything was mapped correctly and is ready to go:
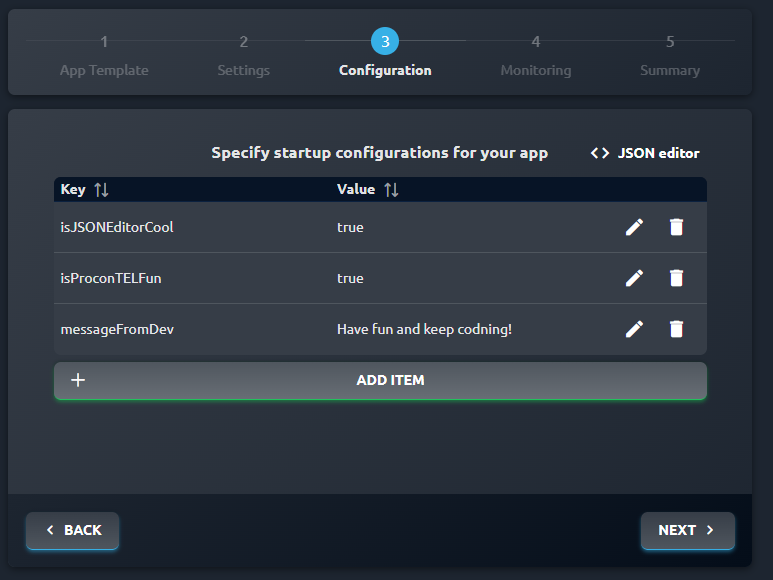
Of course JSON editor is also available to work with at app edit, app template edit and create app views to boost up your productivity and make your life with configurations much easier!
Configuration inheritance
While creating an App instance, using App Template specified earlier, we have to go through configuration step.
All configurations present here are being inherited from the App Template chosen step earlier!
Despite the fact that our configuration is inherited here, we can also tweak this configuration specifically for our App.
Use App Templates configuration as base configuration for your instances and use configuration while creating App instance to tweak your App to suit your needs.
Messaging preferences
These settings will let you adjust the message broker and its queues configuration used to communicate between your Apps. Currently, they can only be edited after the app has been created.
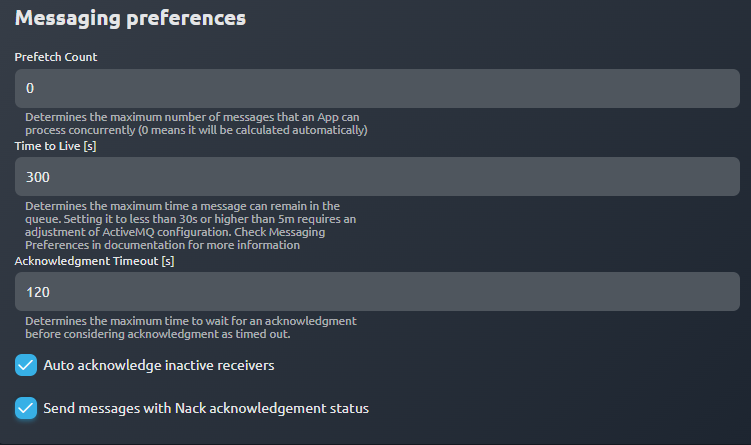
Prefetch count (default: 0, calculated automatically): Prefetch count determines the number of messages that will be delivered to consumers before receiving an acknowledgment for previously delivered and handled messages. This helps in controlling the flow of messages and balancing the load.
Time to Live (default: 300s): Time to live determines the maximum time the message can stay in the queue before being discarded.
Global TTL ceiling
There is a global time to live ceiling of 5 minutes applied to all the apps by default, so to configure TTL for an app to be more than 5 minutes (300s), it is required to raise the value for the ceiling in C:\Program Files\Macrix\ProconTEL 4\activemq\conf\activemq.xml. Lowering this value will lower the global TTL ceiling accordingly. To change this setting, find this line in activemq.xml and change the value of ttlCeiling and restart ProconTEL 4 Message Broker service.
<timeStampingBrokerPlugin ttlCeiling="300000" zeroExpirationOverride="300000"/>
TTL cleanup loop delay
The message cleanup loop in ActiveMQ is executed every 30 seconds, so even if TTL is configured to less than 30 seconds, the actual removal of pending messages might take up to 30s. It is possible to change how often the cleanup loop is executed by configuring expireMessagesPeriod in C:\Program Files\Macrix\ProconTEL 4\activemq\conf\activemq.xml for the queues. After setting this value, it is required to restart ProconTEL 4 Message Broker service for the changes to take effect. In the following example, expireMessagePeriod is set to 5s, in which case the cleanup loop will be executed every 5 seconds.
<policyEntry queue=">" expireMessagesPeriod="5000">
- Acknowledgement Timeout (default: 15s): Acknowledgement timeout determines how long acknowledgement is awaited for before marking it as timed out.
Acknowldgement timeout is also affected by HttpClient.Timeout, however, it is possible to increase it, see Messaging client timeout for more information.
Auto acknowledge inactive receivers (default: true): When enabled, inactive receivers get detected during sending and the acknowledgement for messages receives status Nack. When disabled, PublishWithAckAsync waits for acknowledgements from all the receivers before returning regardless of whether they are active or not.
Send messages with Nack acknowledgement status (default: true): This setting is only applied when "Auto acknowledge inactive receivers" is enabled. When disabled, messages are not sent to automatically acknowledged inactive receivers.
Automatic startup configuration
Automatic startup allows selected applications to be launched automatically when the PCT.Coordinator service starts. Applications are started in sequence according to their priority and configuration.
Enabling the autostart service – the feature must be enabled in ProconTEL Configuration Tool. In the "Other Configurations" → "Startup Options" section, check "Enable automatic startup". Without this setting, applications with RunOnStartup configuration will not be started automatically.
Coordinator-level configuration (Configuration Tool)
In Configuration Tool, the Startup Options section provides:
- Enable automatic startup – enables or disables the autostart service (default: disabled)
- Startup delay (seconds) – delay in seconds from coordinator startup before applications begin launching (default: 30)
- Ignore exception on startup – when checked, the service continues starting subsequent applications even when an error occurs; when unchecked, it stops further startup on the first exception (default: unchecked)

Application-level configuration
For each application, you can set autostart parameters in the Auto start card in the app editor (or in the Monitoring step when creating a new app):
| Setting | Description | Default |
|---|---|---|
| Auto start on coordinator startup | Whether the application should be started when the coordinator starts | false |
| Priority | Startup priority – higher value means earlier startup; same value sorts by alias | 0 |
| Delay before start (seconds) | Delay before starting the application | 0 |
| Delay after start (seconds) | Delay after starting before proceeding to the next application | 0 |
Startup order: applications are sorted in descending order by priority, and alphabetically by alias when priorities are equal. Example app configuration shown below:
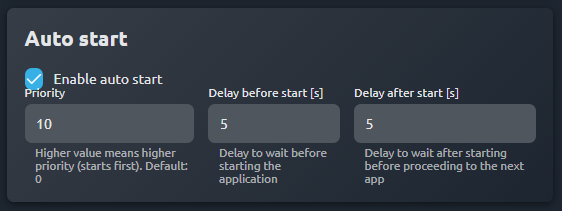
When the startup is disabled in the coordinator service user will get a warning in a dialog as shown below.
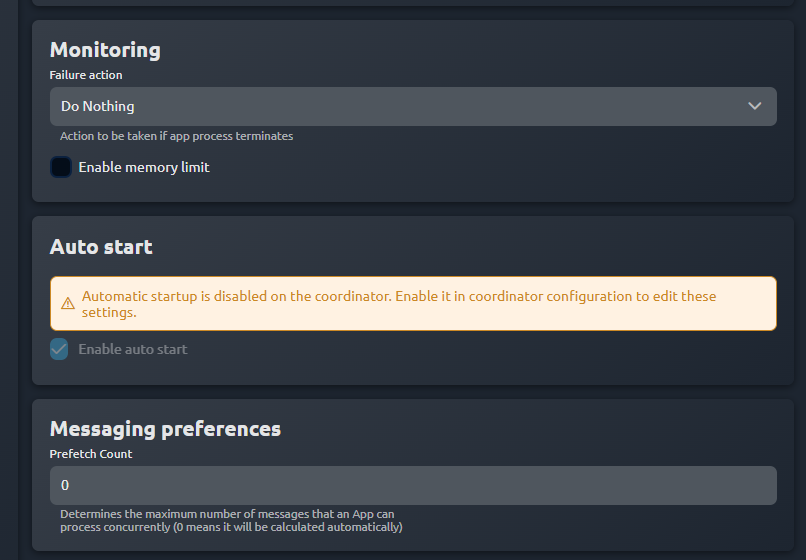
When the autostart is disabled, applications started through the UI or CLI are launched alphabetically by alias.